Blog

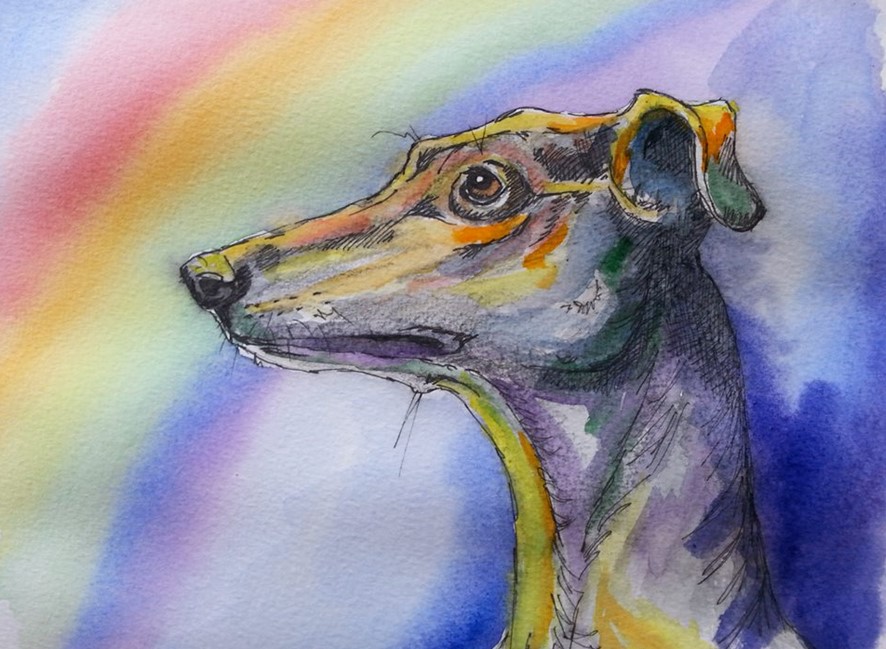
Daisy, watercolours by Yvonne Chapman Brooks

Greyhound love

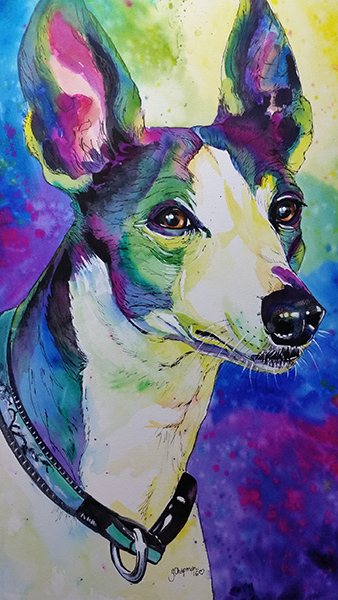
For the love of a greyhound Its no secret that I love Greyhounds. It started 11 years ago when I fostered my very first greyhound, Daisy. It wasn’t going to be a long foster as this little girl completely stole my heart.  She was tiny, small in stature but very thin at just 19kg,  she had been in the regional prison rehabilitation programme where inmates took responsibility of a dog, she did well, and found a forever home….except it wasn’t, it was short lived, one day while her “Dad” was at work, Her “mum” took her back to gap and said she “couldn’t be doing with her” and left.  Daisy was in a terrible condition, extremely thin and withdrawn. GAP took her back and found her a foster home, but she was reactive to cats, so they looked for another, that’s where I come in.  A new beginning Daisy was just 3 years old, she was extremely thin, withdrawn and very quiet. I took her to the vet the day after I fostered her, as her teeth were so rotten you couldn’t get near her for appalling halitosis. I doubt she had ever had a decent thing to chew on or ever been to the vet for a dental, it was awful, her gums were so infected and ulcerated that she could hardly eat, the vet started her on steroids and long term antibiotics before we could even contemplate a dental. I rang GAP,  I said what do you do about Daisy’s teeth, she’s in awful pain, they said, “Nothing until she is adopted”  My response….. “She’s adopted, Im taking her, Now, what are you going to do about her teeth!”  they agreed to pay for her medication and dental work, but it should never had got to this point.  Fast forward and Daisy stayed with me, she is adorable, she was very quiet, obviously some trauma there, as I would find he standing in the middle of the room just like a statue for hours, eventually she would move and sleep. it took nearly 2 years of affection, good food and lots of love to finally find her true personality, then she began to be a dog, a loved pet and to live a pampered life.  Greyhounds in my art I was very taken with the greyhound, a dog whom I had never really considered before as a pet, but I am so glad I went past the Greyhound’s as Pets (GAP) stand at our local agricultural fair, and talked about fostering.  They were elegant, quiet, sleek, athletic and smart. I was hooked, this little girl had me wrapped around her tiny paw, and I began to look at her as my muse. I painted her in so many different ways and gradually the colourful images that I paint today.  she opened my eyes to a whole new world of dog lovers, almost like joining a cult, the greyhound world of rescue is HUGE and they welcomed us and my art with open arms.  I started painting for various rescues, the first main one was “Saving Wilma” on Facebook, a rescued Greyhound who was rescued from a horrific life around the same time as I rescued Daisy, these are some of her portraits below.  “Wilma” Acrylic on canvas, “Goodnight Sweetheart” and “Rainbow Bridge, it’s a beautiful place.” painted after she died.  I painted portraits for fund raising and it went from there. I began to get asked for commissioned pieces and most of them were Greyhounds.  Too many to count Over the last 11 years I have been privileged to be able to paint so many wonderful hounds, every one of them gorgeous and loved. I have used mainly watercolours, but some in acrylics too. I love painting them, they are my favourite, but then every painting I do is a loving tribute to a much loved soul.   Daisy is nearly 14 years old, a miracle considering her heart suffered greatly as a result of her poor dental health, She has one tooth remaining,  and she is on heart medication, lots of heart medication, and is so far managing to love life, albeit at a much slower pace. She has out-lived Otis, my other Greyhound who died in September, and when her time comes I probably won’t have a greyhound again for a while, as we make the most of Shadow, our Mastiff cross. But I will always be a greyhound Mum, a lover of this amazing breed of hound, who’s love is for ever etched in my heart.   Please look at my art and enjoy every portrait ever painted, as well as on my Facebook page… there are many …. sooo many, each one a pleasure to do,  If you are interested in getting your pet painted please reach out and contact me. 

Read More »

It’s Nearly Christmas again!

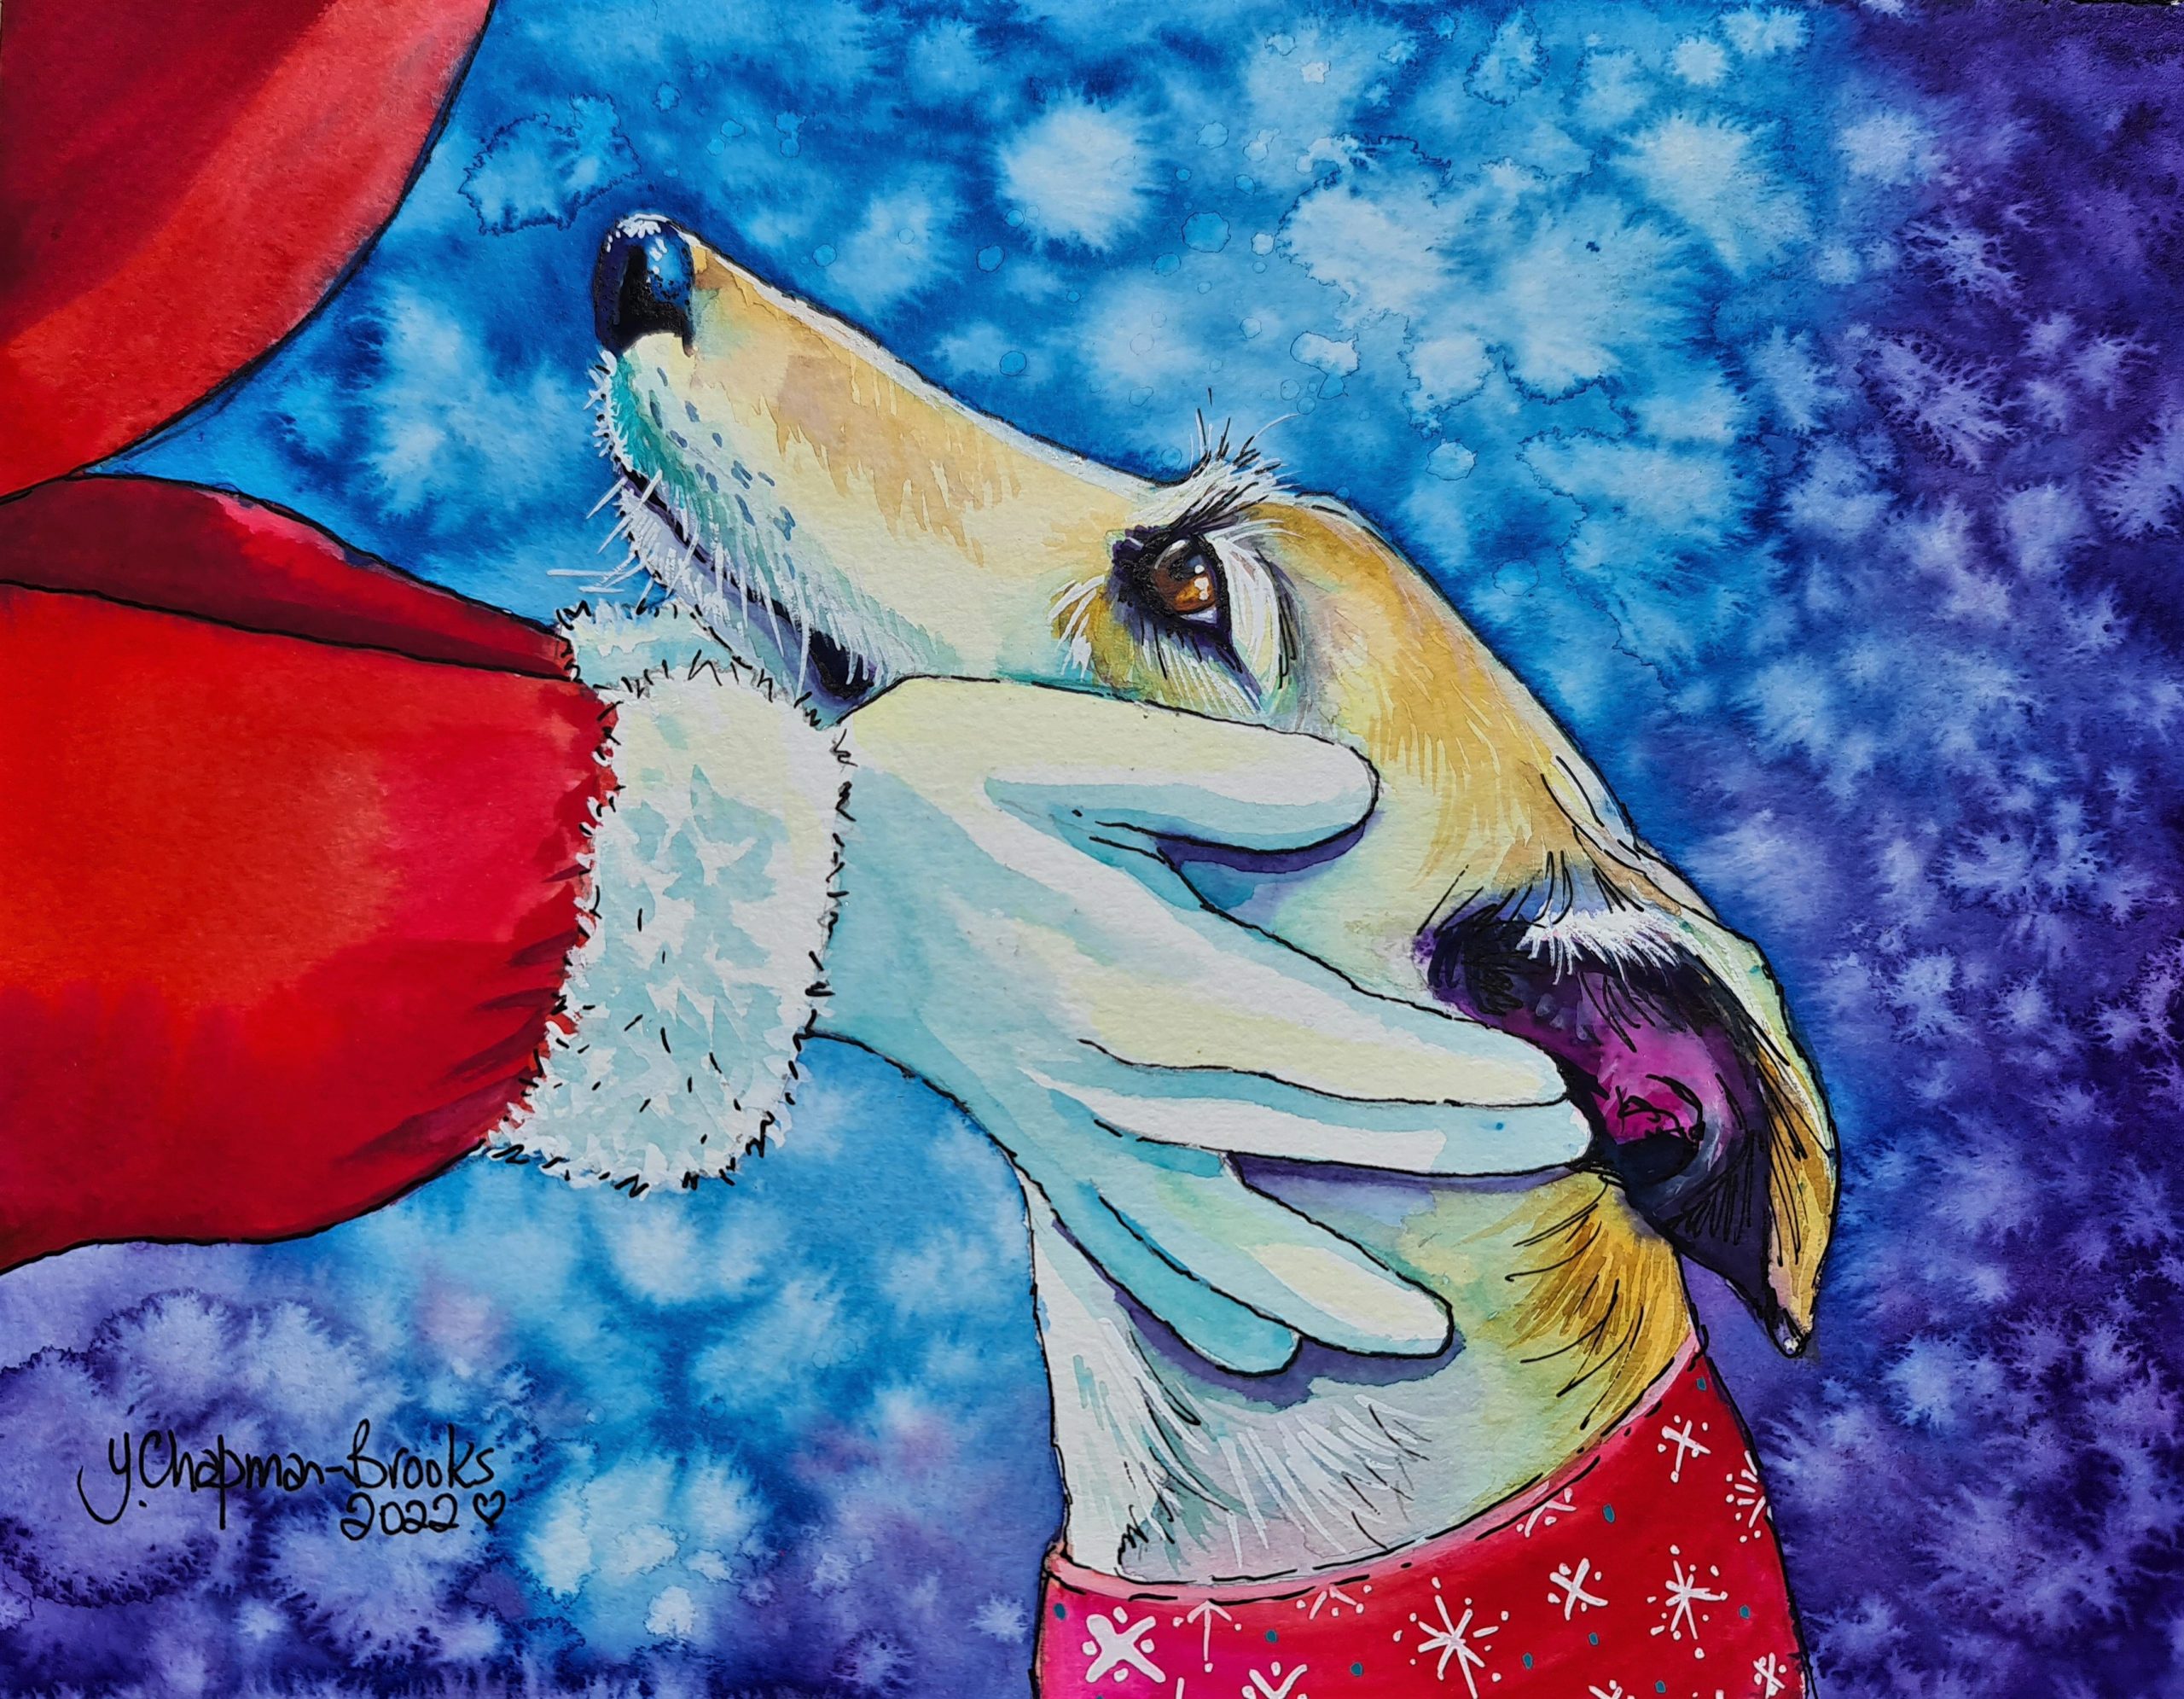
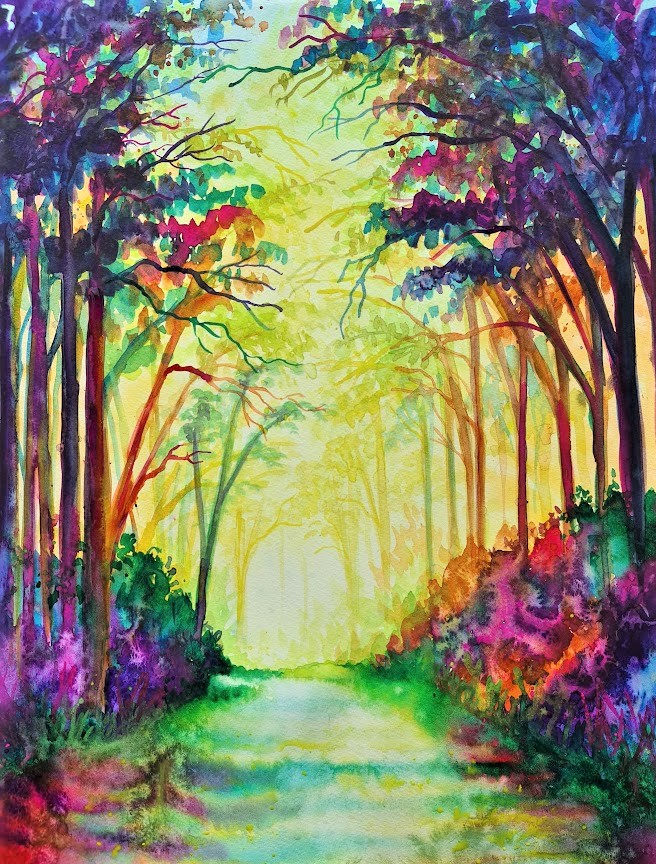
Time to buy your Christmas cards Its time to think about the festive season again, I’m sure it comes around quicker every year. This year I have produced a cat image for all our cat lovers out there, this one has found an interesting twinkly new toy to play with. As for all my dog lovers out there, here is one handsome  dog tempting you under the mistletoe.  “Go on… you know you want to” and “A new toy!” are available now at $3 each. I usually sell in packs of 6 but can split them to individual cards to make up the pack. Prices are in Australian dollars and postage is extra. Please message me if you wish to order either via my website, follow the “Book a commission” at the bottom of this page,  or via my  Facebook page Yvonne’s Artwork I wish to thank all my followers of my Facebook page and my website as your support is so appreciated. I have just won a major prize at the Harvey Art Prize for my treescape, “A Quiet Place” for the  “Works on paper” category, This was a fantastic win for me, and I felt honoured to be awarded a prize for this particular painting. It is one of my favourite images that had been hanging on my wall. Other items available I still have a few of previous my years Christmas cards available, if you would like to still buy those while stocks last, same prices as the others @ $3 each.  This one is “What would YOU like for Christmas” showing a gorgeous Greyhound with Santa. It is a particularly adorable image of gentle hands holding the face of a greyhound, exchanging a moment of tenderness. I also have some of these designs left too. “A Galgo Christmas dreams” showing two rescued Galgo’s snuggled up for the night and dreaming of a sleigh being pulled by Galgo’s. These dogs were a friends dogs, both rescued Spanish Galgo’s in their usual evening repose. I loved painting this image, its no secret that Greyhounds and Sight hound are a favourite subject of mine. Greetings cards I do have a range of greetings cards left blank for your own message, available at the Cellar door at Vineyard 28 in Yarloop WA. These three images are just some of the  greetings cards on sale, left blank for your own message, available at the cellar door at Vineyard 28 The first image is “One last look” which won peoples choice at the 2023 Harvey art Prize .  The second is “Pygmy Possum on Gum flowers,” and “In coming!” a red tailed Black Cockatoo. photograph reference by Ren Theelen.  They are also available as fridge magnets. why not book to go and see my framed artwork on display at the cellar door and try some beautiful boutique wines.

Read More »

Saying Goodbye

Saying Goodbye. Losing Otis To lose a dog is hard, its a raw emotion that affects everyone in different ways, but there is no doubt, its a very hard decision many of us have to make. As followers from my Facebook page will know, I recently lost my Greyhound, Otis. I had been in his life for 7.5 years out of his 13 years on this planet. He came to me as an emergency Foster for “Busselton Greyhound Awareness” in Western Australia, they spotted him on Gumtree as a “Free to good home”. (They had initially fostered him when he finished racing, and recognised him immediately). They couldn’t get the owner to contact them, so asked would I try. I got a response and said I would foster him until he found him a good home. They dropped him off at my home, he lay on the cool floor on a hot, January day, and just stayed there. As they left he made no move to say goodbye or even raise his head as they went out of the door. It was so sad. This boy had resigned himself to being “Left behind.” I found out his story was similar to his first Adoption, a blended family adopted him and had him for roughly a year, then when they split up, the dog went back to BGA for foster. What was wrong with this beautiful, Blue-Brindle, long boy? That’s just it, there was NOTHING wrong with him, he was sad, and he was just waiting to see what came next. Well, I came next. There was no way this boy was going anywhere again where someone else could let him down, so I made a promise, come hell or high water, he was staying with me for the rest of his life. I already had a greyhound, Daisy, who was 8, and a gorgeous boy Harvey, a Heinz 57, with a super gentle nature, who was 10. Such a handsome greyhound Adjusting to a new home Several days went by and Otis was slowly interacting, but most of the time he just lay on the floor, he would wag his tail, a thump – thump on the wooden floors, and raise his head if you called his name. He walked like he was on a mission, no time to stop, while Harvey made his way through orange orchards, with Daisy trotting alongside, Otis was quiet, but he was safe. Fast forward two years…. I had noticed subtle changes, he would rather be in the room with me, he was interacting with Daisy. By this time, I had lost Harvey, another soul dog who is still carried in my heart, so Otis’s role changed, it was his turn to be man of the house, but under Daisy… she was definitely the boss! Then one day as I was in the art room, he came looking for me, I was deep in thought and was nudged by a wet nose on the elbow, he made me jump, he snuggled in for a 3-minute pat and back rub, then shook, and went back to his couch. This began to happen more and more, then after 3 years he actually got on the same couch as me. As I returned home from… anywhere… he would great me at the gate with the happiest of playful dances, followed by zoomies round the yard, more playful dances and then off to the couch. His transition from solo dog to family pet had been made in his head. I think he realised he wasn’t going anywhere, WE were HIS pack, he was here to STAY. Acccepting new family members A new Dad and Brother I met my husband, Paul as lockdown hit, so when he moved in Otis accepted him and his puppy, Shadow, his new brother, his new Dad, willingly. Otis was a happy boy, social butterfly, very cheeky and a lazy couch potato, but the best ambassador for the Greyhound breed. Otis wowed people, they fell in love with him, he was soft furred and stunning looking. He loved his walks, he got so excited, would leap into the car and await his harness being put on, and his hunnyboots. He was dressed for an outing! He would follow one lady, Deb, around the park in her mobility scooter, actively seeking her out, she had treats and lot of cuddles, he was in heaven. He had canine mates who he loved to greet, then he was off on his human rounds, peemails and treats. It’s time Otis fell whilst running and injured his back 3 years ago, nerve damage left him wobbly in his legs and clumsy. He carried injuries and problems with dislocated toes from his racing days. An infected toe injury turned to septicaemia, despite all our efforts to keep in clean and treated, it took a toll on his Kidneys. He nearly died.  He was on pain relief and heart medication in the end, and it didn’t slow him down or stop him, he still had little wobbly trots and would flash you the cheekiest smile if you tried to make him slow down as he zoomed past. Unfortunately, all this took a toll on his aged body. Otis hid illness well, ever stoic, but  cut a toe nail or remove a bandage and get the howl of doom in return, yet when he was in pain, real pain he was silent.  He was quiet and slow over the last couple of days, then deteriorated quickly. A trip to the vet for, we thought, something to stop his nausea and vomiting, it led to blood tests revealing Kidney failure.  Otis was tired, he was ill, and he was in pain. We held him gently, yet firmly in our arms and said the hardest goodbye I have ever said. Our hearts were broken, our loving boy had gone.  Thank you to everyone who expressed sadness and messaged, he was so loved by

Read More »

One Last Look

One Last Look, a watercolour portrait One Last Look was a painting I recently finished after having a slight doubt in my artistic abilities.  For a while now I have painted pictures that I thought would appeal to the public with a selling point in mind. Each art prize I entered had been largely focused on what would sell rather than what would win a prize.  Earlier this year I entered an art prize in a nearby town, which was surrounded by hype and grandeur, and we had to submit our art work.  On the entry form it stated that if not chosen our work could be nominated to go into an Extension exhibition. I wasn’t particularly interested in entering this exhibition but a friend talked me into it, so I entered two paintings, both which were my usual style of the bright rainbow colouring, featuring emus.  My friend then informed me that around the local circles this exhibition was being touted at the reject exhibition, which we though was rather comical. My work didn’t make the original exhibition but was allowed to enter the “Extension” aka Reject exhibition.  Ok, that didn’t bother me too much, I am under no illusion that my work is better than anyone else’s, but I believe my work is of a high standard and I am good at what I do. I have been painting pet portraits for nearly 20 years now.  All was well until the opening, A few careless words threw me into doubt about my work and I had a real crisis of confidence… the mayor opening stated “This exhibition is for those who didn’t make the cut” I was actually a little insulted by her words, and when I looked at other artists around me it seemed I wasn’t alone! My friend nearly choked on her finger food!  There were several really good pieces by well known artists around the exhibition circuit, and quite a few what I would categorise as student/novice works, so it was a well-rounded exhibition. I am aware that art is sometimes seen as “Elitist” and seems to be getting more and more so, especially in the exhibitions and art prizes these days. Gone are the days of just entering and displaying, now some ask for artist statements and CVS!  I decided to enter an art prize that I have entered, and sold at, on previous occasions, in Dalwallinu in Western Australia.  So I painted “One Last Look” as a statement of This is me, this is what I do, I don’t mind if you don’t want to buy it, but it is ME… and a very good version of ME.  My Therapist. A watercolour study My second entry into the Dalwallinu Art prize is “My Therapist” a watercolour study of my motorbike. It is a 2016 Harley Davidson Softail Deluxe and is my pride and joy, I have painted this in acrylics on canvas but didn’t want to have to display that at the art prize, as items displayed often have to be for sale, so I painted a smaller version  that shows what I am capable of doing. I enjoy the challenge of painting chrome work.  The detail in the spokes and engine leaves me with double vision, but the challenge was to prove I could do it and do it well enough to be judged on its merit.  In future I will be painting what I want to paint for these art prizes, something that reflects on who I am as an artist.    https://www.dalwallinuartsfestival.com/

Read More »

Paint your Pet Workshop May 2023

 “Paint your pet in Watercolour,” held in May 2023, was once again a very successful workshop. A beautiful weekend was forecast so the stretching paper demo was able to dry quickly. I usually have about 4 workshops per year,  since the completion of my home studio, I can hold these for about 6 people.  The workshops are split into two days, the first day is a demonstration of the drawing techniques required. I teach  enlarging from a photograph using a simple acetate grid. This is such a handy technique to master as you can not only enlarge but reduce in size too. The simple formula works for simple enlargement of A4 to A3, or even up to the side of a house if necessary! I demonstrated a couple of images, a black greyhound and a black Red Tailed Cockatoo,  the main aim of these workshops is to show how warm and cool colours can be used to create the portraits. Warm colours depict the highlights and cool colours depict the shadows. I chose to demonstrate a bright Rainbow background, and a more natural tonal effect.  The colours I use never change, Lemon Yellow, Australian Red Gold, Bengal Rose (Gouache), Phthalo blue, Bamboo Green (Holbein brand is the nicest blue green I have found as it is bright and beautifully transparent), Indigo and Dioxazine Purple.  Most of these colours can be found in either the Cotman tube ranges (which I recommend for beginners as they are lovely, clear colours, but a cheaper version than the artist quality brands), or the Windsor & Newton range, the other brand I like to use is Art Spectrum, I use tubes of paint verses the pans, as the technique requires large coverage of areas in a short time frame. The final touch is a small amount of titanium white gouache, brilliant for the dots in eyes or stray white hairs, unlike the Chinese White watercolour, which I find is more of a milky glaze than a bright white.  Day 1 Once the outline is drawn with as much detail as possible, we move on to the background. The warm colour area depicts the light source. It is important not to mix certain colours such as the green and Bengal rose as they go very muddy,  not a nice combination, therefore care and thought are needed when placing colours together. I tell the students to think about what colour mixes to what, to get the next colour, for example yellow to red (in this case the Bengal Rose) gives you the oranges.  Day 2 Day two is the fun bit, the actual painting of the subject. The students all did such a great job of their backgrounds, and its not as easy as it looks! There are several different ways of painting with watercolours, the main two are wet on wet and wet on dry, the background is the wet on  wet, but other things affect the process, such as the weather, too hot and it dries way too quickly, to humid or damp and the water takes too long to dry leading to muddy blending. The splashes of paint, that help to blend the colours, are added in several layers as the paint dries. I teach several effects at this stage, if you want to know more….. book into a workshop! How awesome are these! All the examples of finished work are amazing, they should be very proud of their work. .  Even though there is a common theme, everyone’s piece is so different. If the student doesn’t want a really bright image, the colours can be toned down or used in other ways and yet still look “Normal” to the eye. It’s amazing how the eye and brain evaluate the images. You almost don’t notice the bright green or pink that are subtly used in the subject on first glance.  Sadly one of the students couldn’t complete her second day, so I finished her painting off for her, she had made such a tremendous start it seemed unfair that she go home with only half a dog, and it was another example for me to  demonstrate.  I use my images reverted into monochrome as examples to show how the colours really look as tones. This is why the brain usually accepts them as  a “Black dog” instead of a “blue and yellow dog”. I know which of the paints I use have similar tonal values when dry, so I can swap out the Phthalo blue with green, or the magenta with purple.  By the end of the weekend there has been some amazing art created, each one unique, and everyone seems to take away something different from the experience, whether it be a new skill, or a new understanding of colour.  I just hope that they all take away a memory of a fun weekend,  trying something new, if they change their colour palette that’s Great! If they realise what colours can/can’t be mixed that’s great too.  I hope they go away with new ideas and a fun take on a technique. It’s all about learning and enjoying the experience…. having a dabble in a safe space. There’s no right and wrong with art, just a different perception. 

Read More »
Colours of the tropics Textile by Yvonne Chapman Brooks

Colours of the Tropics A quilt

“Colours of the tropics” . A quilt Colours of the tropics was a quilt I made in 2009, hot on the heels of The Four Seasons of Harvey. The WAQA (West Australian Quilters Association) was holding another annual exhibition, this time the theme was Tropical Delight.  I had been wanting to do a Macaw for ages, and after my success with Free motion Machine Sewing with the previous quilt, I was confident enough to do another.  Making the Macaw A good a place to start as any, but one that governed the size of the overall quilt, I knew from the image I had selected to make that he needed to be in the top left corner, his wings outstretched as he swooped in over the scene. He would stand proud at the top of the quilt, and I wanted the gold of his undercarriage to be almost like the sun coming through. I had chosen to put the tri coloured Macaws into the centre of the quilt, so this one was a solo feature, setting the tone for the quilt.  Diving to the depths. The diver was a fun piece to make, complicated, but looked really great as a centre piece. I used 3 different materials for the ocean, 2 patterned, and a hand dyed yellow for the beach. The coral was made from 2 different yellow felt squares, the fish were individually made and inserted between the coral before more pink felt made the pink coral. This was over sewn with thread and beaded. Air bubbles are iridised beads, and the hair was sewn with glossy embroidery thread. I was asked if it was me in the panel, alas no, I swim like a brick! Connecting the pieces together Construction is always a detailed process, I would cut out the pieces I had made and place them together, layering and changing things around, adding more, finding the best layout so everything flowed together as you viewed the finished quilt, your eye following tail feathers down or logs and branches left and right, moving from each individual subject to the other effortlessly, yet not missing anything.   There were so many individual pieces to make in this quilt, Birds, snakes, spiders, frogs, foliage and water, butterflies, flowers, rocks and trees. I lost count of the pieces, just kept making them until I felt I had enough to fill in the gaps.  Using various different fabrics from dress fabric, cottons, my own  hand dyed cottons, velvets and silks, plus hundreds of beads, this quilt took nearly a year to make.  Some were large pieces, like the Macaws, Toucan and the trees. I fashioned those on the tropical fig trees whose root systems are like buttresses holding up the enormous trunks. I decided the best way to frame the quilt was with the trees either side, and flowers along the top.    Hibiscus and Passion fruit flowers I probably made more flowers than I actually needed, and I recall using them on other projects, there are still a couple of hibiscus in my stash at home. They all started as flat pieces of coloured fabric, but with a bit of stitching and thread painting they came to life.  Wildlife The tropics are full of the most amazing fauna. I chose birds that would be big and bold, the Toucan was gorgeous in black velvet, slightly padded to stand out , and with iridised tulle to create a glossy shine.  I hunted for vibrant fabrics with texture and shine, Ulysses butterflies were Velvet and silk,  Kingfishers made from satin and dress making fabrics.  The mossy rocks were cut from mottled brown fabrics and then sewn with small zig-zag stitch, in a circular free motion to create a soft mossy covering.  I used rather cheap, matte yet glary, almost dayglo thread, in limes and yellow-greens,  knowing they would “fluff up” over time, and create a soft wispy look, along with greens and dark green polyester thread for depth and a bit of shine. There were about 5 different threads in those rocks,  Hibiscus flowers were fun to do and most references were taken from my garden. small gold seed beads and pearls made the stamens. They were appliqued on using small zig-zag stitch, which I  worked into the flower so it wasn’t really seen as an outline. The Orb Spider web was made up almost entirely of beads.  The web was sewn in silver metallic thread, and the water droplets were clear seed beads. Sewing with metallic thread poses a problem over layers of fabric as I had discovered with previous quilts, it kept snapping, so frustrating! So the spider web was sewn before other layers were added around it, the beads helped to “Quilt” that area by sewing the layers together. I realised that for exhibition and competition the quilts had to be “sewn to with an inch of their lives” which was very challenging with just a normal sewing machine, and not a “long arm” beauty like most of the competition used. I could be found buried under huge layers of quilt just about able to see. My poor machine … It would clunk away through sometimes up to 10 layers of fabric. I must have been doing something right though, I chose good,  heavy duty needles and only broke 2 in the whole project.  Finishing the Quilt In total there were 9 frogs in the quilt, some hidden away, and the only piece on the entire quilt that I did not make was one of these frogs. It was a tiny pre-made embroidered frog.  The fungi was made from felt, and sewn onto a long branch that formed the bottom of the quilt, covered in moss, and lizards, then covered in small flower shaped buttons in three shades of green. The fungi stands free held onto the quilt with one layer of the circular pattern stitching . The whole quilt is so very tactile. On display, the viewer just wanted to

Read More »

The Four Seasons of Harvey. A quilt.

The Four season of Harvey The Four Seasons of Harvey was a quilt that started my quilt journey back in 2008.  The local Art society and the local craft groups in Harvey, a small town in the Southwest of  Western Australia, decided to hold a joint exhibition in the Harvey Districts Creative Arts Centre , so we picked a theme, “The Four Seasons.” I decided to make a quilt as I was just beginning to learn how to do free motion machine sewing, and thread painting.  I decided to do a large quilt, 1.3M wide by 2.4M long, to fit in my hallway in a house I was renovating. It took a full year to make and is the largest free motion piece I have ever done.  The quilt was constructed in 5 panels, the top one for the sky and distant hills, which would be finalised with gum leaves, blossoms and gum nuts. The second depicted both the orange orchards that Harvey was known for, and its Dairy produce.   The Orange trees are laden with fruit in the middle of the piece, then back to bare trees. The paddocks show the seasonal changes as they go from grass to hay, (I used upholstery ruching for this,) which is then harvested and baled, and  finally covered in grazing cattle. The third panel was probably my first big challenge. The cows in Harvey represent the beef and dairy industry, and in town there is a historic old abattoir, which is now slowly, sadly,  falling to pieces, but at the time had a water tank and windmill still intact.  The main cow was from a photo taken by a friend of mine, Bryan Waller, who allowed me to use his image, a cow licking its nose leaning over a fence. This was the main subject piece for this panel.  By now I had some practice with my free motion and piecing of images, so the cow was the first thread painted piece that I felt really proud of.  The other cows consisted of appliqued pieces cut from printed fabric, and two images taken from  paintings of mine, and fabric pieced and sewn. I was also quite proud of my building too, it looked textural and 3D .  From drawing to pieced  image, to sewn. Note the collie next to the cow. I had jsut recently lost my collie cross dog Max, so decided to put him into the quilt.  Getting adventurous! Vineyards in the Harvey region are represented by grape vines. I tried to depict the changing season by first showing empty vines, then vines with green and black grapes with a full ripe bunch in the centre. The late harvest is shown in rust and orange tones, and then the vine goes back to to being an empty vine.  This was very ambitious for me. I was using different fabrics and sewing with metallic thread, something I found really difficult over several layers of fabric. Very frustrating when the thread kept snapping.   I used beads to create 3D texture to the finished piece, and the main bunch was a mix of velvets and hand dyed cotton.  Max made his second appearance in this panel too.  Wild Flowers The next panel depicts the spring wild flowers,  Spider Orchid, Blue enamel orchid, Donkey Orchids, Banksia, Poppy. I also added some Blackberries, not native to WA but I had found some in Tasmania and they reminded me of home, plus, I wanted to make some as I had found perfect black beads! There was a lot of beading on this piece. I searched for ages to get beads that I could use in this quilt.  The magpie with his ever watchful beady eye was fun to make, I like him,  I think he adds character.  In WA we have magnificent coloured Splendid Fairy Wrens, the males are the most spectacular blue during mating season.  Waterways Around Harvey are rivers and waterways plus irrigation ditches for the paddocks, in them there is an abundance of wildlife, kingfishers, ducks, dragon flies and frogs.  Now I was getting really adventurous! I made my own fabric using silk tops and PVA glue, this meant I could cut it to shape and sew it! I used it on the breast of the central front facing duck, which I was really proud of, and my Bobtail Lizard, made entirely of silk paper. A little bit of thread painting and free motion sewing and they were the best pieces so far! The bottom branch was also made entirely of silk paper and thread painted.  By now though I had been sewing for almost a year, so my technique improved and my confidence had grown, setting myself more challenges.  Finishing the Quilt Finishing touches were placed around the quilt to bring the quilt together, Bees, extra birds, Oranges and gum flowers. construction was challenged using my tiny Janome sewing machine, and was completed using two tree trucks as a frame. I was so pleased with the finished quilt. It was a journey of discovery and firsts, along with  learning a technique that grew as the quilt grew, I grew in confidence. My next quilt was even better! That’s  for the next blog…. The Four Seasons exhibition was a great success with a great mix of art and craft.  My quilt was entered into the 2009 WAQA quilt exhibition where I entered it under the Theme for that year  “Natures Beauty.” It WON! It also won Peoples Choice, Members Choice and went on to the BEST OF THE BEST Exhibition in Melbourne the following year. Not bad for an absolute beginner.   It hangs in my home, I have moved form the original house it was designed for, but it still hangs proudly in my entrance hall. 

Read More »

Carousel. Tradition with a Twist quilt

Tradition with a Twist was the 2016 Theme for the AQC challenge, I chose to create a “Carousel”. The tradition being a yearly fair that would attend local towns in the Uk when I was growing up, where the favourite attraction was the Carousel. The twist, well I always liked to think I was riding a real horse, so there he is, a real horse in the carousel. I started with a watercolour concept of the four horses I wanted to recreate, then had to replicate this into material.  Making a pattern and placing the fabric Making a pattern is important, I have enlarged my image onto several acetate pieces and drawn the image as detailed as possible.  I reverse this acetate pattern and use it to trace the Vliesofix, a bonding mesh that will be used to iron the fabric on to the calico backing, by reversing the image for drawing I can put the tracing the right way up to place the fabric underneath in the right spot. I call this Trace and Place.  It allows me to place several layers of fabric in the right spot for ironing and bonding, and finally sewing.  Sewing begins As the shapes begin to take place and once layering has been completed Sewing begins. I use only straight and zig zag stitch for all my textiles. I have a very basic small Janome for this so as the quilt gets bigger it can be a challenge to sew. I have a huge stash of thread which I begin to thread paint over my fabric pieces, paying attention to direction, texture and colour.  As sewing is completed on the horse images, I cut them out from their calico backing, making a piece that will eventually be sewn into place, making it in separate pieces means I can keep it as flat as possible with no buckling as I sew. I can also compose the best composition, they look quite stunning on a black background! Making up the background I hand painted the background using acrylic paints mixed with a textile medium for permanence. I was going to have an evening look but decided it wasn’t bold enough, so went with the black and made it night time, this way the lights of the carousel would appear brighter.  I added white globes over the painted light so there would be a glow behind them.  I also added the 3rd and 4th horse poles.    The shine on the real horse is a cellophane Angel Hair filament, when placed between baking paper and ironed it makes a solid web of “fabric” that can be cut to shape and sewn, without losing any of its shine or glitter.  the floor was made from large pieces of fabric, sewn to look like wood, then blended with velvet that had been hand dyed with real bright colours, to create reflected lights.  The finished quilt measured approximately 36 inches square. 90cm x 90cm.  Winning quilt. This quilt was entered into the AQC (Australian Quilt Challenge) in 2016  It very nearly didn’t make it at all, as on the 7th January 2016, when it was halfway though construction, WA’s Largest bushfire threatened our town, having destroyed the neighbouring  town of Yarloop  and tragically, with loss of life. I was evacuated to a nearby town and taken in by really amazing strangers who quickly became friends. They took in a woman with a half finished quilt, a few clothes, a car full of dogs and all stressed to the max! it was almost a week before we were allowed home.  But I finished it.  CAROUSEL was entered and chosen to exhibit with 30 others at the craft exhibition in Melbourne, and around Australia for the next year. It didn’t win anything here, but the following year I entered it into the Mancuso World of Quilts in the USA where it won “Best use of Colour: Innovative section” I was blown away. A major prize!

Read More »

Paint your pet workshop

“Paint your pet” workshop Teaching art is my something I love to do, combine this with teaching you how to paint using my signature style and this makes for a great workshop.  Once again I am holding a Paint your pet Workshop. In the past these have proved to be very popular, and the results are amazing. From people with artistic knowledge and experience to the beginners, everyone leaves with a stunning pet portrait.  I have taught at several workshops now and each one has been an amazing experience. I have been fortunate to meet some wonderful artists and beginners , and been lucky enough to help them on their art journey.  A great learning opportunity At one of my workshops you will learn a few valuable tools to enable you to paint from a photograph. Pet portraits are fun as you already have great knowledge about your chosen subject, and that helps with the fine detail. DAY ONE Step one:  Learn how to stretch watercolour paper.  This is so the paper dries flat when you apply large amounts of water. The paper is soaked so the paint will run and blend during the process of painting the background. Without stretching the paper it will dry buckled, this doesn’t come out either, making framing almost impossible. You can create a fantastic piece of art that is ruined by buckled paper.    Enlarging a drawing from a photograph Step two:  You will learn is how to use a grid to enlarge a photograph.  This is a fantastic way of enlarging or reducing an image, you can pick out fine detail, shading, shapes and know the proportions  and the placement is correct.  Essential for a good pet portrait! Here two students, one a total beginner, are enlarging their photographs. This  was from a workshop in the Porongorups, WA Step Three:  Learn about warm and cool colours and how to paint “wet on wet” to achieve my signature backgrounds. I give you a material list of paints to buy and brushes that will be used in this workshop, that way everyone is using the same colours as I use, a great way of making a start to your art supply collection. I use tubes of watercolour paint as they go further and spread easily during the wet on wet process.  Once the portrait is drawn the background is completed. That concludes day one of the workshop. DAY TWO Step four: The next day  students learn how to paint the portrait, what colours to use to achieve my signature rainbow styling, and tips and hints to achieve a great portrait.  Step five: Pen work. I use pen work on top of my portraits to add extra depth and texture. I use a draftsman Rotoring ink pen but a artline fine marker works just as well. Finally the white gouache, the end touch, the dot in the eye or highlight that finishes the portrait.  Not one student has left any of my workshops so far without a fantastic painting. I am thrilled that some have attended several of my workshops, and all students agree they have learnt a lot of valuable information during the workshop. I like to think that I can help them to gain confidence and most of all enjoy the process. The workshops are full on, busy, and most of all FUN! Want to book a workshop? My workshops are advertised on my Facebook Art page, the next on is the 18th and 19th of March, 2023,  where I have 3 places still available. The cost is $250pp. You can contact me about doing a workshop, either by using the contact form on this website, or through my Facebook page.  I work in my studio at my home in Pinjarra, Western Australia, and can take 6 comfortably in a class.  Otherwise if you can rustle up some like minded friends, (no more than 10) I could possibly come to your venue, within Western  Australia. (travel cost apply to workshops in states outside the southwest WA) https://www.facebook.com/YvonnesArtwork/

Read More »