Saying Goodbye
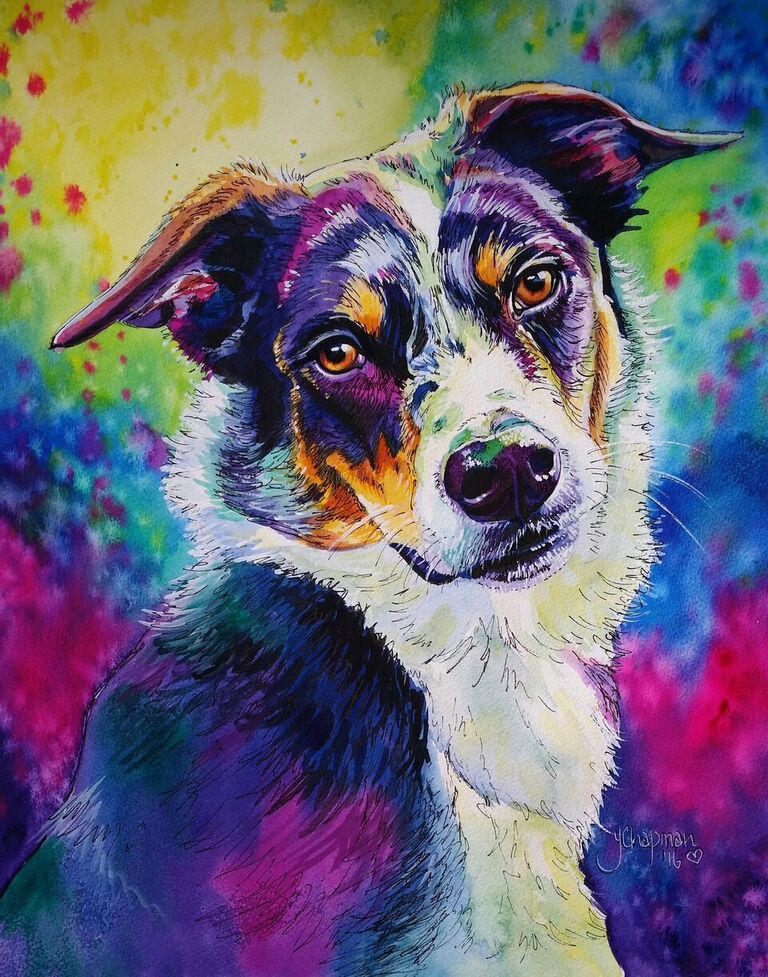
Saying Goodbye. Losing Otis To lose a dog is hard, its a raw emotion that affects everyone in different ways, but there is no doubt,
Saying Goodbye. Losing Otis To lose a dog is hard, its a raw emotion that affects everyone in different ways, but there is no doubt,
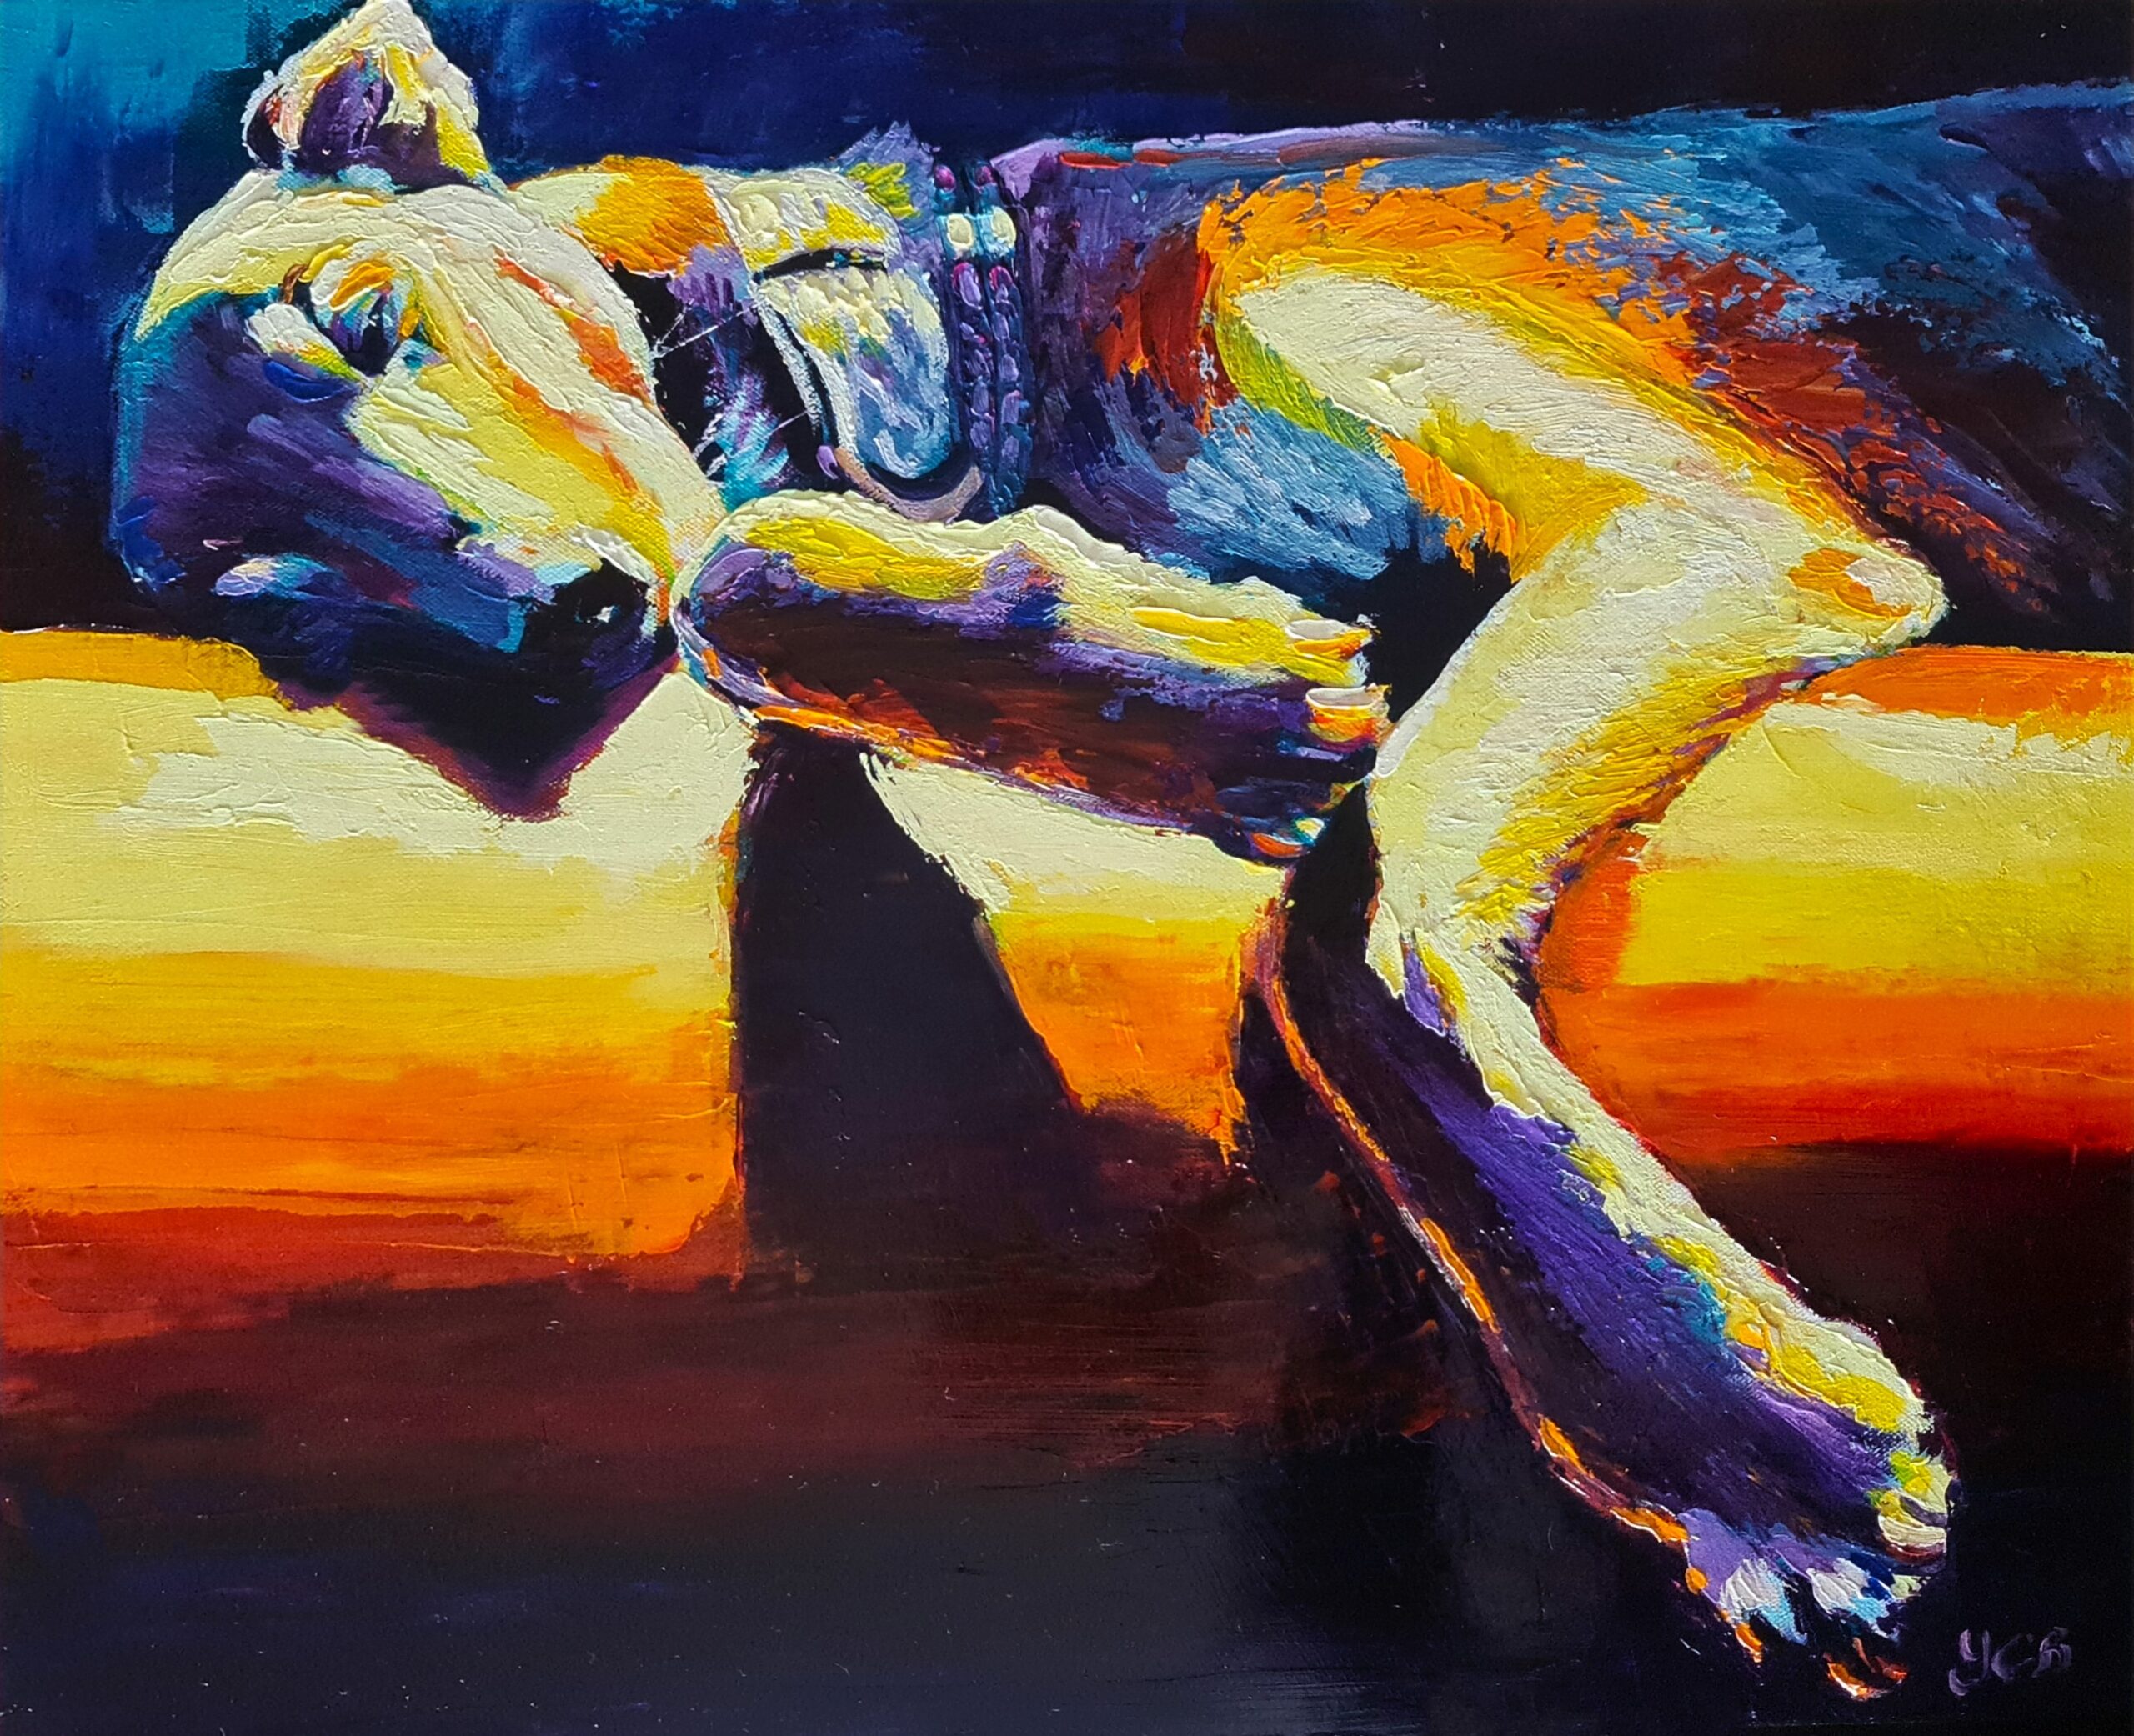
One Last Look, a watercolour portrait One Last Look was a painting I recently finished after having a slight doubt in my artistic abilities. For
“Paint your pet in Watercolour,” held in May 2023, was once again a very successful workshop. A beautiful weekend was forecast so the stretching paper
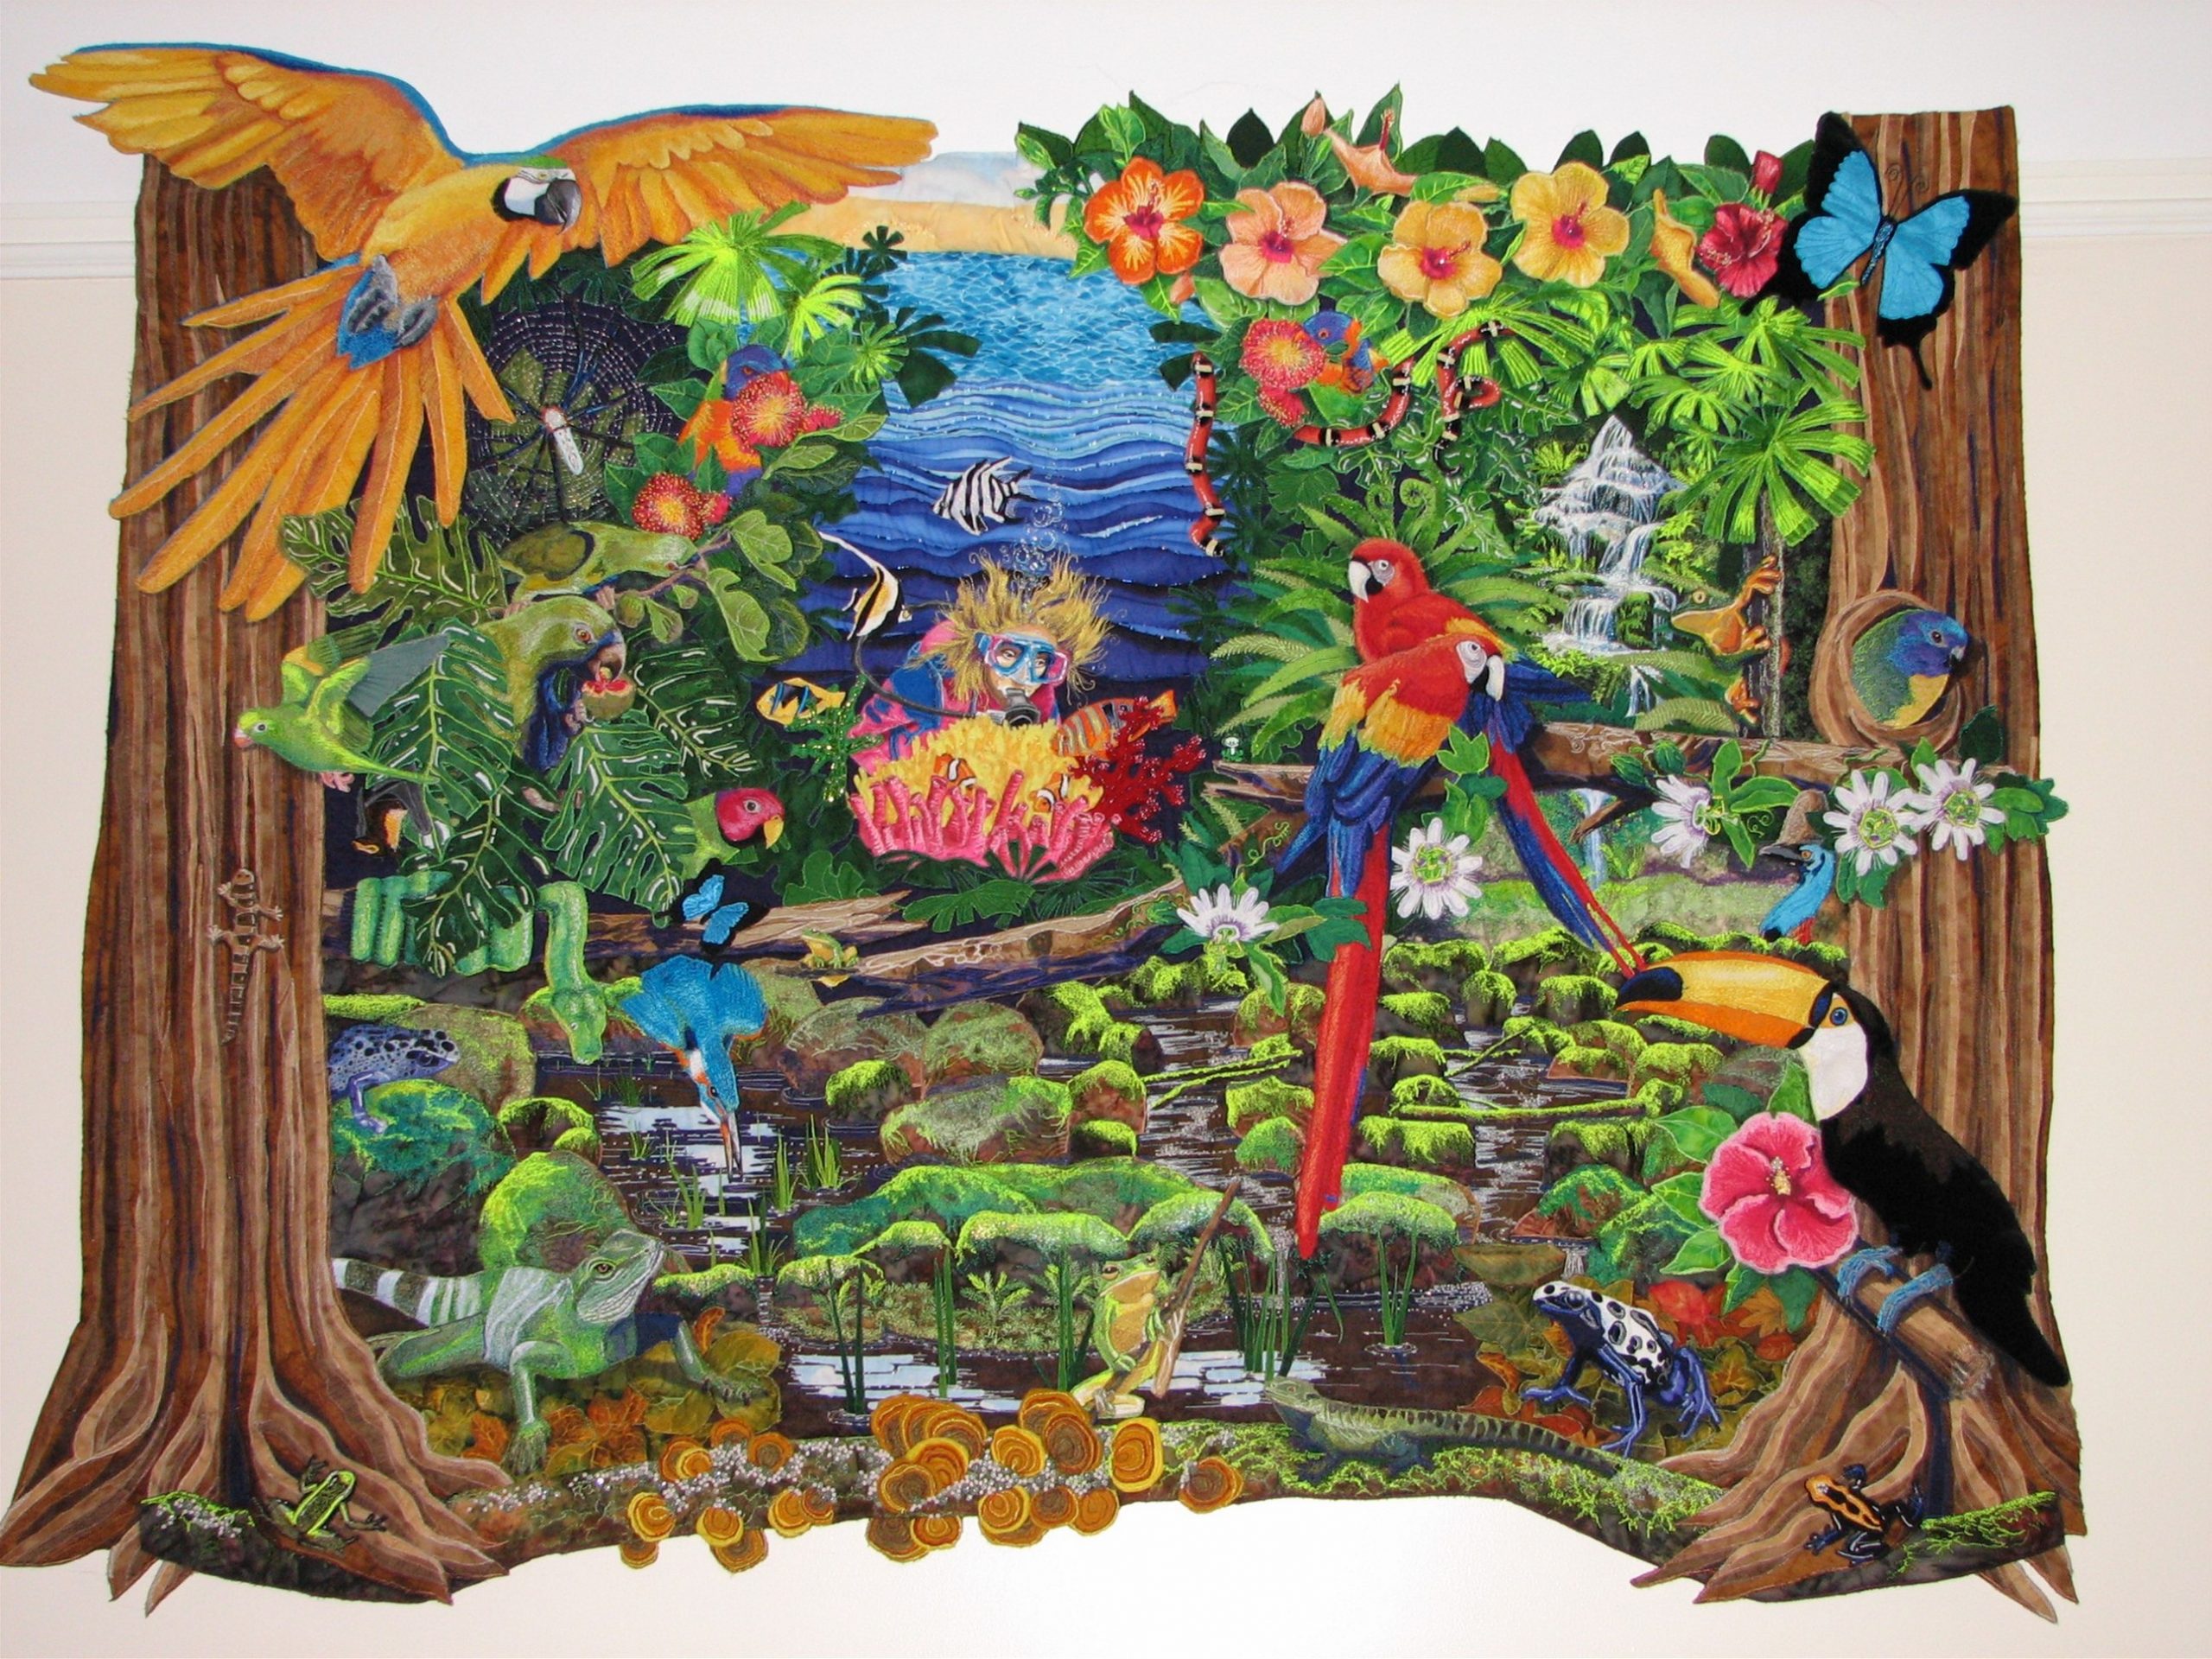
“Colours of the tropics” . A quilt Colours of the tropics was a quilt I made in 2009, hot on the heels of The Four
The Four season of Harvey The Four Seasons of Harvey was a quilt that started my quilt journey back in 2008. The local Art society
Tradition with a Twist was the 2016 Theme for the AQC challenge, I chose to create a “Carousel”. The tradition being a yearly fair that
“Paint your pet” workshop Teaching art is my something I love to do, combine this with teaching you how to paint using my signature style
The making of the “Saving Magic” quilt, depicting magic, Macau Canidrome survivor by Yvonne Chapman Brooks
Making of “True Blue Mates.” A Quilt. in 2015 I made a quilt for the Australian Quilt Challenge (AQC) for the themed challenge “True Blue,”