Making a motorcycle come to life
I love the challenge of painting chrome and paintwork. So many reflections, so much detail, I love the challenge of realistic painting, it has to be done over time, carefully, examining the photos for every detail. This was my husbands bike, a Harley Davidson Ultra Limited, this painting was his Christmas present and was painted over a 6 month period. It is Acrylic on canvas block. It is a large painting, and even though canvases are primed when you buy them, I do prefer to add a couple of extra coats of gesso primer before I start.

Making a start
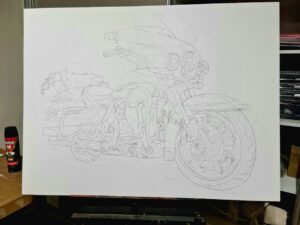
Once the sketch is completed I start blocking in the backgrounds. I use 3 colours for this one, that will compliment the bike, an Atelier red-black, burnt sienna and Atelier brown-black.
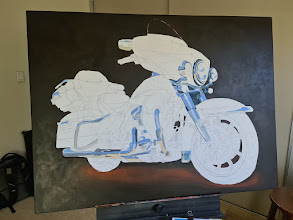
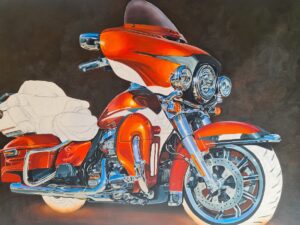
I begin by blocking in the chrome parts of the bike with a couple of colours that will form the main reflections, Australian sky blue and unbleached titanium for the pavement reflections. By doing this it gives me the areas to focus on first as they are the most complicated, and require the most concentration. I have to keep reminding myself, “paint what you see, not what you think you see!”
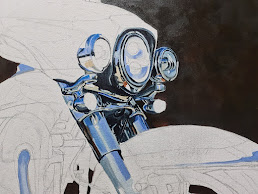
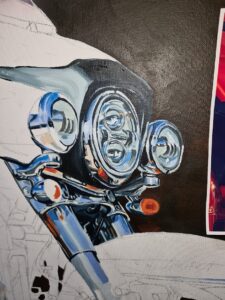
The headlights, driving lights and tops of the forks are starting to take shape, I add more detail and depth into the reflections, plus just a touch of colour for the indicators. Slowly the images start to take shape, at least with Acrylic it is easier to correct if you go wrong.
I can now start to work down the bike to the forks and front fender. I have airbrushed in the windshield for now, and then I can make a start on the mid section of the bike, the engine guard, foot boards and highway pegs. Basic blocking in helps to map out the areas of chrome, refining and adjusting depth of reflection.


It is starting to get complicated
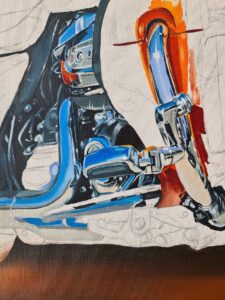
Now the fun really starts, the engine bay is mostly black with some chrome, but there are nuts and bolts and chrome reflections that seem to melt into each other. I don’t use “Black,” I use a mix of Blue-Black and Burnt Umber, maybe a tiny bit of Prussian blue. It takes a lot of concentration and patience to paint this part. The air cleaner took nearly 4 hours alone, and the engine guard with the highway peg took about the same! I did block in some colour for the paintwork to see how the colours looked against the chrome, as its easier to adjust my palette now, rather than later.

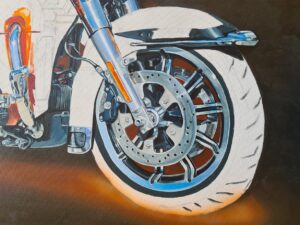
I continue working on the exhaust system and the chrome at the back of the bike. Wheels are my least favourite part to do as there is so much detail to paint, and so much that can look wrong. At Least this bike isn’t like mine, a HD Softail Deluxe which has spokes!

Adding colour is always fun.
I was worried that I would have trouble getting the paint colouring correct, the bike’s colour changed at various times of the day. It was a mix of Permanent Orange, Red gold, Yellow, crimson, burnt Sienna and Red-Black. The paintwork has a gold fleck in the paint which was very yellow in the photographs. I paid great attention to detail in the shading and shapes formed by reflections on the paint, it was hard getting a smooth finish with just a brush, but by working in several layers in managed to get the look I was after.

Almost finished, the end is in sight!
The seat and passenger seat are painted in blue black and Australian sky blue mixed. Highlights of white are added to the Australian sky blue to create a sheen, with hints of white for the glossy highlights on the seams and edges. The tyres are painted using a warm grey, mixed from Blue-black, a hint of burnt umber and unbleached titanium.

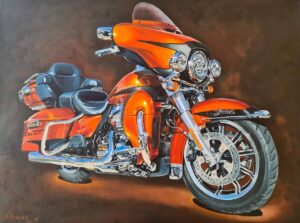
And there you have it! One finished painting of a beautiful machine. The floor under the bike was airbrushed using orange and a bit of yellow, with an ellipse of brown black under the tyre for shadow.
Once the paint has cured It is varnished with two coats of Atelier Gloss varnish.